Here are the five steps for a DIY installation of ground-mounted solar panels: Select the best spot for your ground-mounted solar panels. Design and build your ground structure. For our scenario, we consider the foll wing: System size: A 2. 4kW solar system of 6 x 400W solar panels. Every. . The IronRidge® Ground Mount System combines our XR100® or XR1000® Rails with locally-sourced steel pipes or mechanical tubing, to create a cost-effective structure capable of handling any site or terrain challenge. Installation is simple with only a few structural components and no drilling. . Scroll to the bottom of any page to find a sun or moon icon to turn dark mode on or off! Greetings all, was glad to discover this forum last year and have browsed through the content to increase my (limited) knowledge on ground mounted solar panel installations. My goal is to install during June. . Hence in the following, we will see briefly the planning, designing, and installation of a standalone PV system for electricity generation. That said, you still need to approach this process cautiously — there's a fair amount to do.
[PDF Version]
Today, we're installing the roof hooks, grinding tiles, and securing rails for our solar panel setup. . Installing solar panels yourself can seem a little daunting if you've never done it before or even if you have. You will be laying out, measuring, aligning. . Rail Selection is Load-Critical: XR100 rails handle most residential applications with 8-foot spans, while XR1000 rails are essential for high wind/snow areas with 12-foot spanning capability. Undersizing rails can lead to structural failure and warranty voids. Total System Cost Beyond Rails: While. . Learn how fast and easy it is to install Pegasus Rail and no-tool Splice in this training video. Pegasus is available at a distributor near you. Whether you're working on asphalt shingles, standing-seam metal, or tile roofs, rail alignment and anchoring are the backbone of a stable solar array.
[PDF Version]
Whether you're a DIY enthusiast or a homeowner looking to go green, this video has everything you need to know. What You'll Learn: Introduction to Solar Power Systems: Understanding the basics. Planning Your Installation: Assessing your energy needs and site evaluation. . To successfully install solar panels on a mountain, one must consider several key factors, including 1. A detailed site assessment is imperative for identifying the optimal location. We cover the materials, safety c to install the mounts that will support the solar panels. step tutorial on how to install wall-mounted solar pa to know about. . In this guide, we'll explain what solar panel mounts are and why they matter, provide a step-by-step walkthrough to build solar panel ground mounts yourself, share tips to boost your system's efficiency, cover essential permitting and safety info, and even show how to mount solar panels on an RV. . Meta Description: Discover how mountain solar installations work, their unique challenges, and cutting-edge solutions. As of Q1 2025, mountain regions accounted for 18% of. . Harness the unique advantages of mountain solar installations to achieve energy independence while maximizing your home's natural elevation and exposure.
[PDF Version]
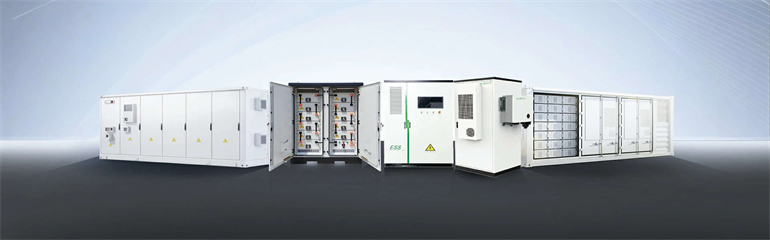
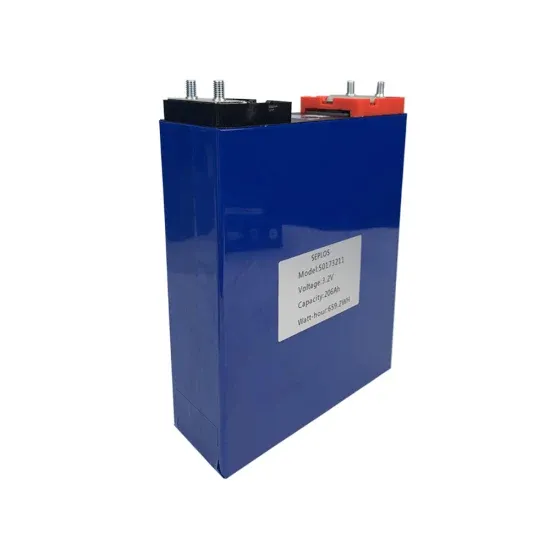
Yes, in most areas you need a permit for solar panels on a shed. Always check with your local building department before installation. Local rules vary: some need only electrical, others zoning approval too. This guide explains when permits are required and how to make the process hassle-free. Do You Need a Permit. . Most simple shed solar setups require just 200-400 watts of power, which powers LED lighting, charges batteries, and runs small devices. Solar systems for homes might seem expensive, yet solar shed solutions start at $500 for a small off-grid system. These codes, which encompass structural, electrical, fire safety, and zoning regulations, provide a comprehensive framework for the proper design, installation, and. . That whole system—the panels, the racks, the wiring—has to be engineered to survive. But if you plan to run large tools and appliances, you'll need larger wire and a larger breaker.
[PDF Version]
The gap between solar panel rows should be around five to six inches, but it is also recommended that you leave one to three feet of space between every second or third row. This is because maintenance workers need enough room to get on the roof and make repairs whenever necessary. . Panel spacing-to gap or not to gap? Is it necessary to leave space between panels to allow for expansion? Its generally good practice in construction, but do these "grow" much? I'm guessing that they don't, but what say the experts? Please, lets leave wind out of this. I'm really just curious about. . When looking at a solar panel array—whether on a rooftop or mounted on the ground—you may notice small spaces or gaps between the individual modules. It will space the first panel (or two) and then you just maintain that across the. .
[PDF Version]
Essential tools like a drill, adjustable wrench, wire stripper, and multimeter reduce potential errors. Incorrect or low-quality tools can compromise performance or result in. . Going the DIY route can save you thousands, but only if you have the right tools for DIY solar panel installation. Missing even one essential tool can lead to ” As an Amazon Associate, we may earn from qualifying purchases at no extra cost to you. Thinking about installing solar panels yourself?. We have listed down the 21 most essential tools that your technician must be equipped with for solar installation projects. Whether you're a professional solar installer or someone taking on a DIY project, having the proper equipment is crucial.
[PDF Version]